Saturday, March 22, 2014

Gluten-Free Apple Turnovers


I know I'm supposed to be sharing a recipe for coconut maple rice krispies treats...but I'm more excited about this recipe :)!  Pastry isn't a word you hear a lot in gluten-free circles, but I hope that changes soon.  I know those wonderfully buttery, flaky layers of carby goodness aren't easy to come by without gluten...but I don't want to say it's impossible to make a flaky gluten free pastry.  Because, dang it, I got pretty darn close... Just look at that pic!!!  How close?  So close that a friend (who doesn't eat gluten free) said SHE COULDN'T TELL THAT THESE APPLE TURNOVERS WERE GLUTEN FREE!!!


Heck yes, now that IS music to my ears, take that SXSW (sidenote: we're in austin and this was a very musical city last week :).  We had some leftover "pastry dough" that I used to make mini cinnamon sugar twists, and my 1 year old gobbled them up.  That's why they aren't pictured here ;).

I've got another gluten-free pastry recipe 'round here.  It's a couple years old.  I scaled down that recipe and modified it a bit.  So here's something new and butterfully amazing for you to sink your teeth into this weekend.  Oh, please make them and tell me how you like them!  I promise, if you do, I will never have to beg you to make them again, this recipe will become a staple ;).

One of these days I will post that rice krispies recipe I owe you...and I know I still have to make that fried chicken, dear reader who asked about it, I promise I haven't forgotten.  But when your entire household just got over the flu, pastries are called for.

I'll be back soon!  :)

Gluten-Free Apple Turnovers

For the flour mixture:
1/2 cup white rice flour
1/4 cup brown rice flour
1/2 cup tapioca flour
1/4 cup sweet sorghum flour
2 tablespoons potato starch
3 tablespoons almond meal
1 tsp xanthan gum
3/4 tsp sea salt

A few tablespoons of corn starch to work with the dough
1 stick butter, cut up into small cubes to combine with 1/3 cup reserved flour (see below)

The wet ingredients and sugar:
1 large egg, at room temp
1/4 cup half and half
1/3 cup sugar

The yeasty ingredients:
2 tablespoons warm water
1 yeast packet

The filling:
2 granny smith apples, peeled and slice up into small 3/4 in. cubes (you want them to fit into small pastry squares)
1/4 cup sugar
1/4 cup dark brown sugar
1/4 tsp cinnamon
1/8 tsp all spice
pinch of salt
2-3 tablespoons corn starch
1/2 tsp lemon juice

Make the filling: 
After prepping the apples, combine all the ingredients in a medium sized bowl and add the corn starch last (that's the thickener.  You can let these sit out while you do prep the pastry dough.
First start by mixing all your dry ingredients together until they're well combined.  Next, you're going to RESERVE 1/3 CUP OF THAT FLOUR MIXTURE TO MAKE YOUR BUTTERY LAYERS.
(technical term is absent from my mind right now, I know it's a french word, and I will probably misspell it so you'll have to deal with my "buttery layers" term instead.)

Fold the butter into the reserved 1/3 cup of flour until and form it into a nice buttery cube.  Stick this in the fridge.

Next, combine the "wet ingredients and sugar" with the remaining flour (the larger quantity you didn't just combine with the butter ;)

Proof the yeast in the warm water, then add this to the bowl with the flour and wet ingredients.  If you've got a standing mixer, now's the time to fold this together.

I let this dough sit in a covered, warm area for about twenty minutes.

Next, you're going to have to be really patient (this is the hardest part) because you're going to fold that refrigerated doughy butter cube into the dough that was rising for 20 minutes. This is how you'll do that (I THINK THIS BLOG HAS GREAT PICS ON HOW TO DO THAT CLICK HERE TO SEE IT):

Get some parchment paper or foil and place it on the counter, along with a rolling pin.  Sprinkle a generous amount of corn starch onto your work surface and the rolling pin.  Roll it into a rectangle as best you can.  It should be about 1/2-3/4 of an inch thick (THIS IS THICKER THAN TRADITIONAL DOUGH WITH GLUTEN, BECAUSE GLUTEN-FREE DOUGH ISN'T AS FLEXIBLE :).

Next, place your butter cube in the center of that rectangle of dough.  You're going to create an envelope out of the dough by bringing that top part of the dough toward you and covering the butter square, then tucking the bottom half of the rectangle over that layer so that the butter square is covered by the top and bottom half of the dough. Now, roll over this creation so that it's about 3/4 of an inch thick, and fold the left side over the right side and roll it very lightly.  NOW PUT IT IN THE FRIDGE FOR 30 minutes and REPEAT 2 MORE TIMES AFTER THIS.

Side note: I know this is time consuming, but I'm giving you permission to eat all of these pastries the first time as a reward for all your hard work!  Or, if your family and friends threaten to steal them all before you can take a bite, just take a picture and frame the masterpiece, because that's kinda what I wanted to do after all that.

After you've done all that waiting and rolling and folding, you can get to the next step, the fun part: Get a fresh piece of parchment and foil, sprinkle (aka a handful) cornstarch over your work surface and get ready to roll..just one more time. Shape that buttery dough into a rectangle, as best you can and use a pizza cutter or buttered knife to create 8 squares.  Fill them with as much apple filling as you want (try not to add too much juice because it will spill over and burn the bottoms of the pastry).  Give them an egg wash or dress them with more melted butter, and sprinkle with some turbinado sugar.  Now, one more waiting session: let them rise for about 30 minutes.

Next, bake at 350 for about 20 minutes, or until the edges start to brown. Let them cool for a bit.

FINALLY, Enjoy your buttery creations without missing the gluten, that's the easiest part :)!

And of course, feel free to email me with any questions, friends.  Happy baking!


Monday, March 3, 2014

Gluten Free Multigrain Bread (that rises beautifully!)


For years, I have been trying to find (and make) a gluten-free bread with a deep, rustic flavor, and that actually RISES.   On cold days, I wanted soup and this kind of dreamy rustic bread for a hearty sandwich or just a slab of creamy butter. It was a craving for oh sooo long!  For years, so many loaves of bread ended up in the trash because they either had a beany taste, or they got stale before we got a chance to finish them (they were forgotten about and still aren't worth remembering).  Bean flours. Yuck.  I see them used in many bread recipes that come with a guarantee to rise.  But that bean taste... blah!  I just can't get over it.  I even tried using just 1/4 cup of bean flour (garfava, to be exact) in a recent recipe and I could still taste it at the end.  Bean there, done that?

The funny thing is?  I LOVE BEANS.  Just not in bread.  I love beans so much I used to crave them when I was pregnant with my first daughter; my husband and I used to joke that we'd call her Frijolina.  If you speak spanish, or if you know how to use a handy online translator, you'll know that frijole means bean.  Yes, that was my firstborn's first nickname, when she was about the size of a bean in my tummy when we lived in Beantown (true store, remember Boston?).  See, I love beans!  Just. Not. In. Bread!!!!  Of course, I do have a health conscious husband who's always keeping me up to date on the latest in health news, and he claims (after reading this reputable book)  that beans are actually not all that healthy for you, anyway (and that white rice is actually one of the safer starches... shocker!).  Some folks like to soak beans in vinegar to help get rid of the toxins... but, I digress!  Just wanted to give you the lowdown on beans and my complicated relationship with them.

Now, my health-conscious blog readers, I know!  Dun, dun, dun... I used xanthan gum!  Ack!  Shouldn't I be using something more healthy like chia seed or flax?  Well, truthfully?  I've experimented with them and they alone don't provide enough of the "oomph" required for a generous rise.  So, now you're probably wondering why I'm not using that lovely fiber supplement known as psyllium husk with or instead of the seeds.  Well, I don't plan on co-partnering with Charmin or any of their toilet paper competitors, so I'll just save you and me a few trips to the bathroom and stick with xanthan.  The amount of fiber required to provide the lift I'm looking for is quite high.  A few folks who've transitioned to using fiber as their "gluten-free glue" claim that it takes some getting used to and can cause GI upset.  But, for kicks, I actually tried using acacia fiber which is a fiber I am familiar with, and is similar to psyllium.  It's actually a more "gentle" fiber, in my humble opinion.  I've never had a bad reaction to it.  It did produce a bread with a pretty good rise, but, alas, xanthan is still the best.  Yes, it is a manipulated corn derivative, so use it sparingly--or not at all if you have an allergy, and do opt for the fiber in that case...but I recommend the acacia fiber for starters.  I, personally, do not react poorly to xanthan, and the quantity I use is so small that I don't mind sticking with it, no pun intended...(xanthan makes things so sticky!).

But the beauty of sharing recipes is that YOU can make them your own by experimenting.  Feel free to use this recipe and switch out the xanthan for fiber and let me know how it works!


I will still be experimenting with this recipe myself, but for a good reason.  What is it?  Well, this bread kinda rose so high that it started overflowing in the tiny glass baking dish I used.  Next time, I'll use a standard bread pan (I am so used to gluten free bread not rising that I didn't anticipate the overflow). My bread pan runneth over with gluten-free goodness, does yours? ;)  Also, I wanna try to make rolls with it at some point, but I think that would require a bit less liquid, maybe one less egg.  Anyhow, feel free to experiment with this recipe...but I do recommend trying it as-is at least once, because it would be delicious with a bowl of soup on a cold night like tonight.

I've got some exciting recipes to come! As soon as my kiddos get over the flu, I will be working on a fried chicken recipe.  Yes, the flu!  Dang, and I thought March was a time for flowers and sunshine, and as I write this there's thunder outside, a winter weather advisory in effect, and two kiddos ready to feel better! Last night, after a long day of caring for two sick babes, I needed something sweet and comforting so I made some delicious maple coconut rice krispies treats with the simplest ingredients (we'll just call them brown rice cereal treats ;).  They'll be up next!


Gluten Free Multigrain bread (THAT RISES and doesn't taste like beans! ;)
1 cup white rice flour
1/2 cup brown rice flour
1/4 cup potato starch
1/2 cup sweet sorghum flour
1/2 cup buckwheat flour
1/4 cup oat flour
1/4 cup millet flour
2 TBSP almond meal
3 tsp dry milk powder
3 tsp xanthan gum
1 tsp fine sea salt
1 1/2 tsp poppy seeds
pumpkin seeds, if you want (I topped the bread with a sprinkle of Bob's rice cereal, pumpkin seeds, and poppy seeds for texture)

1 fast acting yeast packet combined with 1/4 cup warm water

1 3/4 cups hot water
3 TBSP grade b maple syrup
2 large eggs at room temperature

1. Mix all the dry ingredients in a standing mixer until well combined.  

2. In another small bowl, proof that 1/4 cup warm water with the fast acting yeast.

3. Combine the eggs with the dry flour mixture, add the hot water and the maple syrup.  Mix for about a minute in the standing mixer (at about a medium speed), then add the proofed yeast. 

4. "Pour" batter-like dough into a well-greased bread pan (I used a glass pyrex medium bread pan, but that was a bit small :) -- the bread dough, before rising, already filled the pan.  Next time I'm going to use a pan that leaves about 1/4 in of space from the top).  Smooth top with wet fingers and sprinkle with your favorite seeds/nuts/oats.

5. LET RISE FOR AN HOUR THEN BAKE AN HOUR AT 375 (LEAVE IN OVEN WHILE PREHEATING AND INCLUDE THIS TIME IN THE ‘HOUR’).  

Friday, February 7, 2014

Gluten-Free Snickerdoodles


It's hard to believe this blog has been around since 2007!  Thank you for sticking around, despite the many quiet moments away.  Honestly, it hasn't been very quiet around here, with two very active and happy toddlers.

It's an exciting time.  I'm now able to share my love of baking with my firstborn, who becomes very offended if I even think about preheating the oven without her around.  So most of the time I do my baking when it isn't nap time, and a lot of those times an extra tablespoon of one thing or another gets thrown into the mixing bowl :).  But those moments in the kitchen are some of my favorites.

I promise this recipe will deliver, and that sticky fingers didn't throw in an extra tablespoon of salt or cream of tartar ;).  It's a classic recipe that's been perfected for the gluten sensitive, I promise. These were the lightest gluten free cookies I've ever tried, and a few mouths were even fooled into believing they were laden full of gluten.  There are a few surprising ingredients thrown into the mix, but I think that's what contributed to their light and airy texture.

Hope you enjoy these with your favorite people :).  Stay warm, wherever you are.

I know I owe one of you a fried chicken recipe, and I will get on that.  I also have a recipe for some of the gooiest gluten free cinnamon rolls you'll ever try.  A recipe that literally took years to perfect.  Don't think I've been wasting all this time away; there's been a lot of experimenting going on, and I'm happy to share some of the results with you.  There have been a few new gluten free flours thrown into the mix, and a bit of new information about those flours and our health uncovered, all info worth sharing. So... stay hungry :).

Light and Lovely Gluten-Free Snickerdoodles 
Makes about 18

1/2 cup white rice flour
1/2 cup brown rice flour
1/4 cup tapioca starch
1/4 cup potato starch
1/2 tsp xanthan gum
1/2 tsp fine sea salt
1 tsp baking soda
1 tsp cream of tartar
pinch of nutmeg

1 egg
5 tablespoons butter, softened slightly 
1 tablespoon yogurt
1 tablespoon buttermilk
3/4 cup white sugar

For rolling:
1 1/2 tablespoons sugar
1/2 tablespoon cinnamon

Preheat oven to 375
Combine the dry ingredients and mix well with a fork or standing mixer.  Combine the wet ingredients with sugar in another bowl and mix well, then slowly incorporate the dry ingredients while mixing.  You can refrigerate the dough, but I just dropped balls of dough, about a tablespoon full, directly into the cinnamon sugar mixture, and then rolled them while they were in the mixture.  I did this instead of rolling the dough beforehand, I found that the cinnamon sugar coating made the dough very easy to manipulate :).  Make sure you arrange them about an inch apart on a cookie sheet, giving them some room to expand.
Bake in a preheated 375 degree oven for 12 minutes


Monday, January 7, 2013

Gluten-Free Sticky Toffee Pudding


If you never, ever bake anything in your life...
Or if you resolved to not eat sugar in 2013...
Make an exception for this life-changing dessert: Sticky toffee pudding!

It's one of my favorite foods.

I'll even go so far as to say that I'm sure they eat this for dessert in heaven (daily), while they peel garlic and chop onions with dull knives while dreaming of sticky toffee pudding in the underworld.

Yes, it is that good.  And friends, this gluten-free version is just as good as the gluteny one.  How do I know?  A few years ago, actually about 5, I posted a non gluten-free version on Flour Arrangements, and this one made me equally as happy.

Sure, it's quite ugly.  But you know what?  My toddler, (the biggest little food critic who happens to hate any food that doesn't look good--I mean, she won't even eat mashed potatoes because she doesn't like how they look!) yeah, she LOVES this dessert.

And your family will too.

You know how you're probably feeling guilty right about now for re-gifting your fake plastic pearls to that special someone this past Christmas?  This is the perfect way to make up for it!  Not just for them, but for you too ;).

Be sure to sprinkle some sea salt on top of the toffee sauce! mmm....


GLUTEN-FREE STICKY TOFFEE PUDDING

Bowl 1:
1/3 cup white rice flour
1/3 cup potato starch
1/4 cup tapioca starch
2 TBSP teff flour
1/4 tsp xanthan gum
1/2 tsp sea salt
1 teaspoon baking powder

Bowl 2:
8 large medjool dates, roughly chopped
1 1/4 cups boiling water
1 teaspoon baking soda

Bowl 3:
1/4 cup unsalted butter, softened
3/4 cup dark brown sugar
1 large egg
1 teaspoon vanilla

Sea salt for sprinkling

Use this recipe to make the toffee sauce (I also added some maple syrup to it before it thickened)

Preheat oven to 350

Begin by combining in a large bowl all the ingredients from Bowl 1.

Allow all the ingredients in Bowl 2  to rest while you proceed to combine the remaining ingredients in a third bowl...

Cream together all ingredients in the third bowl, from the Bowl 3 list :).

Use an immersion blender to blend the dates, water and baking soda from Bowl 2.

Next, slowly mix in the ingredients from Bowl 3 into Bowl 1, then add the rest of the ingredients from Bowl 2.

Pour all of these magical ingredients into a greased 9 x 13 oven safe dish and bake on the middle rack in a preheated 350 degree oven for about 30 to 35 minutes.

You want the middle of the pudding to be a bit soft when you take it out of the oven.  Next, set your oven to broil.

Pour enough of the sticky toffee sauce to cover the top layer of the pudding; place in broiler for 1 to 2 minutes, until the top starts to crackle.

Remove from oven and pour some more toffee sauce on it, then sprinkle with sea salt.  Let it cool a bit then serve it with even more toffee sauce (load up on that sugar!).  Whipped cream would be really tasty on top of this too, but this dessert really isn't missing anything.

And before saying goodbye, I have to admit that I made this in honor of the US season premiere of Downton Abbey ;).


Wednesday, November 21, 2012

Classic Gluten Free Stuffing


Happy Thanksgiving Eve!

Here's a Thanksgiving recipe for those who appreciate a traditional stuffing, and the rolls I featured on here a few days ago :).  It's based on this recipe and it's a very forgiving one.  You can easily make this your own by adding or removing your favorite ingredients.  I really like apples and cranberries, so I threw them in. But if you prefer a more savory stuffing, just make it with the celery and onion.  Sausage would be a nice addition, too.  I'd say the most important ingredient here is...butter!  Of course.  This recipe doubles nicely but please, please be sure you make sure to double the butter (at least).  The more butter, the better!

Classic Gluten Free Stuffing
Makes enough for 5 hungry folks
2 cups crumbled gluten-free rolls
2 cups crubled gluten-free corn bread
1/2 cup chopped green onion
1/4 cup finely chopped white onion
1/2 cup finely diced celery
3 tablespoons butter
1/4 tsp salt
1/4 teaspoon ground black pepper
1 1/4 cup chicken broth
1/4 finely chopped fuji apple, no skin (I also added 1/2 cup cranberries)
1/4 tsp sage
1/4 tsp poultry seasoning

Preheat oven to 350

Crumble up the corn bread and biscuits, set aside in a greased oven safe platter (9 by 12) .  Toast the bread crumbs in the oven for 15 minutes. Remove then raise temperature to 375.

Sautee the celery and onion in the butter.  Then add all the spices, include the salt and pepper.  Lastly, stir in the chicken broth.  Cook on low for 5 minutes.

Pour seasonings and broth mixture over the bread crumbs in the pan.

Bake at 375 for about 20-25 minutes on middle rack, until top is golden brown (or as toasted as you'd like it).

Tuesday, November 13, 2012

Gluten-Free Holiday Dinner Rolls


It's a little over a week before Thanksgiving.  Now's the time to search for reliable gluten-free holiday recipes.  Only issue is, they're not always easy to come across!  Honestly, this recipe is reliable. I've made these rolls about 6 times already.  If you're worried about your non gluten-free friends disapproving, fear not.  I baked them again last night to accompany a tasty butternut squash soup, and my husband (who is usually on the paleo diet) broke his diet yesterday and ate 3 of these in under 10 minutes!

Yes, this recipe calls for quite a few different flours, but that's the secret.  The combination works perfectly to create a moist dinner roll that isn't heavy and dry, like some gluten-free baked goods can be.   I've tried substituting things here and there, and the only thing that really works is using teff flour in place of almond meal.

I've discovered that using too much sorghum flour produces a funny after taste. Using too much almond meal (or rice flour) creates a gritty texture.  Too much potato starch and you've got a really heavy roll, that probably won't roll ;).  Too much starch, actually, also creates a heavy roll, which is why I don't use both tapioca starch and potato starch here.  I've also tried using just flax seed in place of xanthan, but the dough doesn't rise as nicely and the texture is sticky.  Can you tell that my kitchen doubles as a chem lab?  Baking gluten-free really does make me feel like a mad scientist sometimes.  Throw a rambunctious toddler and a 3 month old who won't nap into the mix, and you can add emphasis to the mad part ;).  It gets pretty crazy.  But that's half the fun ;).

Next...a traditional gluten-free stuffing that uses these rolls.

OH, and if you're feeling really carby, double this recipe and use half the dough to make cinnamon rolls!  Totally works (I tried it).  Actually, I first got the idea to use corn flour for these rolls after trying The Gluten-Free Girl's cinnamon rolls (yum!).


ROLLS
(Large) Bowl 1:
1 cup white rice flour
1/4 cup sweet sorghum flour
1/4 cup almond meal
1/2 cup brown rice flour
1/2 cup potato starch
1/4 cup corn flour
1 3/4 tsp xanthan gum
1 tsp sea salt
2 tablespoons maple syrup or honey
3 whole eggs
3 Tbsp olive oil butter (you can substitute all oil if making casein-free; I've tried it, it works!)

(Small) Bowl 2:
1/4 cup and 1/8 cup warm water (microwave for 30 seconds)
1/2 cup warm apple cider or cloudy apple juice
2 1/4 tsp yeast (fast acting)
3 tablespoons sugar

For topping:
1 tablespoon melted butter
1/2 tablespoon honey
sprinkle of bob's rice cereal or gf oatmeal

Start off by combining everything dry.  Stir well.  THEN create a well in the middle of the flour where you can add the rest of the wet ingredients listed under "Bowl 1".  Set aside.  In a smaller bowl, combine the apple cider, sugar and warm water.  Add the yeast, let sit for 5 minutes.  Lastly, combine everything together, fold together until uniform.

Get a bowl of warm water, set this aside.  Line a cookie sheet or casserole dish, coat with butter.  Now begin shaping the rolls, using water (or melted butter, yummy) to wet your hands before and between shaping the balls of dough (this works better than flour, helps the rolls turn golden).

Use a pastry brush to brush with melted butter/honey (you can also use maple syrup), then sprinkle with cereal (also tasty left alone without the cereal).

Let rise half an hour in preheated 200 degree oven (the oven should be off while they're rising though :).

Finally, bake for 20-25 minutes at 375, no preheating, just turn the oven on while they're still in there after rising.

Makes 16-20 rolls.

Tuesday, October 16, 2012

Spicy, Soft and Chewy Gluten-Free Ginger Cookies


...And there's not a drop (or sprinkle?) of xanthan gum in this recipe, folks!  So if you want to make your gluten-free friend a special cookie this coming holiday season, you don't have to spend $12 on a bag of xanthan gum that you'll never use again (...let's avoid having it spill all over your pantry floor or cupboards, like it always seems to do in mine)!

I'm still experimenting with xanthan gum-free recipes, and I've found that making gluten-free bread without xanthan gum is pretty challenging.  It seems the dough doesn't want to rise as nicely.  But if you want to make a light pie crust or batch of cookies, all you need is a teaspoon or two of cold milled ground flaxseeds.  I heard about this baking secret from the gluten-free girl. (If you can make delicious gluten-free bread with flax, lemme know!)

Ok.  So maybe it isn't a secret.  I think I'm just a little behind, as with most things :).  And this is why I'm getting getting an early start on the holiday baking.

I can't wait to do a cookie exchange!  Only thing is, I think I might be the only one bringing a batch of gluten-free cookies.  But at least I'll be able to fool their taste buds into thinking that the chewiness is from gluten!

These Big Soft Ginger Cookies looked good.  But one thing I've learned from All-Recipes' recipes is that their members usually give THEIR OWN versions of the cookie/dessert 4 or 5 stars, but they seem to offer quite a few critiques of the original recipe.  So I read the tips and tweaked away, all the while remembering that I'd be working on a gluten-free version.

When using gums like xanthan and guar (What weird names.  Still feel like I'm speaking some sort of green-eyed alien language when saying them), more liquids are required.  I usually throw in a few extra eggs, or a bit more milk/water/etc.  But this time we're using ground flax mixed with a bit of hot water.  The result?  A cookie that isn't heavy.  Instead, it's soft, chewy, and even spicy.

That's how I like my ginger cookies, with a kick.  2 1/2 tsps of ginger did the trick for me.

Now that I've got you thinking about holiday baking, what Christmas cookie do you want to see gluten free?  Email me your requests starting.... now!

I can't seem to get my hands off of that Better Homes and Garden Magazine with all the pretty festive cookies on the cover.  But it's $10!  Guess what?  You can find those recipes by googling "Better Homes and Gardens Christmas Cookies".  First link, promise!  I'll be making a few of 'em.  Don't they look good?!


Spicy, Soft, and Chewy Gluten Free Ginger Cookies
Makes about 16 medium ginger cookies

Bowl 1
3/4 cup tapioca starch
1/4 cup potato starch
1/4 cup teff flour
1/2 cup brown rice flour
1/2 cup white rice flour
1/2 tsp baking soda
2 1/2 tsp ginger
1 tsp cinnamon
1/2 tsp cloves
1/2 tsp sea salt

Bowl 2
1/4 cup dark brown sugar
3/4 cup white sugar
1 egg
combine 2 tsp ground flax with 2 tsp boiling water (in another small bowl)
3 TBSP olive oil butter
3 TBSP non hydrogenated shortening
2 TBSP molasses

1/8 cup sugar for rolling cookies in...

Preheat oven to 350

Mix together all the dry ingredients in one big bowl.  In another bowl, combine the wet ingredients (I know sugar isn't wet, but you know :). And in yet another small bowl, stir together the flax and water. Then work everything together in the biggest bowl, don't be afraid to get your hands dirty.

Roll the cookies into little balls, then roll them in the extra 1/8 cup of sugar you set aside.  Place them on a cookie sheet about an inch apart on a greased cookie sheet, and flatten them a tad with your fingers (they will spread, but don't leave them as brown balls.  Doesn't look pretty on the cookie sheet this way, and won't cook evenly either. :)

Bake for 9- 10 minutes in your preheated 350 degree oven.


Thursday, October 11, 2012

Cranberry Pecan Maple Bars


Merry Christmas!

Paying attention?  Just checking :).  I'd be impressed if you were.  Seeing it's been MONTHS since I've blogged.  Easter, actually.

I digress...

I might as well be wishing you a Merry Christmas; I'm already baking for the holiday season and listening to Christmas music.  In fact, I listened to Nat King Cole's version of Jingle Bells about 20 times earlier today.  Not because I'M obsessed.  My two year old is.  "Again!",  she cried.  And AGAIN it played.  (I also don't know how to disable the replay feature on my iPhone.  Why is my iPhone set to replay?  Because a certain 11 pound someone falls asleep to the "White Noise" track.  See photo below to find out who this someone is. :)

We cheated and had a semi-Thanksgiving dinner last week, too.

In my yard, the scarecrow wears a scarf and a Santa hat, while the snowman's got a pumpkin head (not really, but  I've considered giving him a much needed make-over).  Around here, We celebrate all the holidays together!  Why not?

But you're here for the food, right?

Back to the holiday baking topic.  I've been experimenting with two recipes, one for biscuits and the other for pumpkin bread pudding (which uses the leftover biscuits).

...Also been working on a stuffing recipe that's been tested out on a few folks already.  They survived the test!  That means it'll be on here soon.  I posted a stuffing recipe a few years back, but it's my family's colorful version, which includes all kinds of fruits and nuts--a reflection of the actual family, perhaps? ;)  Kidding!

Anyhow, last year my sister-in-law was on a quest to find the perfect stuffing recipe, the kind she grew up eating at her grandma's every holiday season.  She found the recipe!  Only thing is, it wasn't/isn't gluten free.  So I took that recipe and gave it a gluten-free make over. Because her gluten-filled version smelled so good, I couldn't resist.  The recipe called for Pillsbury Biscuits.  Man, those are good and how I miss their buttery sweetness!  Well, I think I might've found their gluten-free counterpart... stay tuned for the recipe.  I promise I'll post it before Christmas 2013 ;).

Stuffing... that reminds me.  I stopped feeling like a stuffed turkey around midnight on August 16, 2012.  Why?  Because my sweet and delicious Juliette Vera was born on that very day.  Here she is.  Don't you just want to gobble, gobble her up?!  :D


Now, here's a treat that reminds me of Boston.  My old home.  Since we're in Texas now, I made sure to throw in a few pecans.


Base of Bars:
1 cup white rice flour
1/2 cup tapioca starch
1/4 cup almond meal
1/4 cup potato starch
1/2 tsp guar gum
1 1/2 tsp baking powder
1/2 tsp sea salt
3/4 cup dark brown sugar, packed
1/4 cup maple syrup
1/2 cup milk
2 large eggs
3 1/2 tablespoons butter
1 tablespoon coconut oil
3/4 cup dried, sweetened cranberries

Crunchy Topping:

1 cup pecans, roughly chopped
1 1/2 tablespoon butter
1 tablespoon maple syrup
1/4 tsp cinnamon
pinch of salt

Sauce:
1 tablespoon milk
2 tablespoons maple syrup
1/2 cup white chocolate chips
1 1/2 tablespoons butter
pinch of salt


Frosting Drizzle:
powdered sugar
tablespoon of maple syrup
1 tablespoon water
2 1/2 tablespoons cream cheese

It's a long recipe, so let's keep the instructions simple (Is that's possible in the gluten-free world of baking? ;)

Preheat oven to 350

Mix the "Base" ingredients together, starting with all the dry ingredients.  Put the wet ingredients in another bowl, then stir to combine.

Next, prepare the "Topping" by first melting the butter with the pecans, then adding the rest of the ingredients.  Cook on low until this thickens.

Grease an 8 by 11 inch pan, then pour the "Base" in.  Next, evenly layer the topping!

Work on the "Sauce". Just throw everything together in a microwave safe bowl and microwave it all together for 30 sec increments while taking stirring breaks, until everything is nice and gooey.

Lastly, pour that over the topping and bake it for 25 minutes at 350 on the middle rack.

Lastly (I mean it this time ;), when everything is cooled, prepare the frosting glaze and drizzle it over the bars.  I don't measure this part.  It should be like a thick glaze in texture.  First add the cream cheese, water, and maple syrup, then add enough powdered sugar to give it the desired consistency.

Saturday, April 7, 2012

Gluten-Free Sugar Cookies

Gluten-Free Sugar Cookies
Makes about 20

1 cup white rice flour
1/4 cup tapioca flour
1/2 cup potato starch
1/4 cup brown rice flour
1/4 cup almond meal
3/4 tsp orange peel, dried
1 tsp coarse sea salt
1 tsp xanthan gum

1 1/4 cup sugar
2 eggs
1 tsp vanilla extract
5 tablespoons softened butter
1 tablespoon orange marmalade
1 tablespoon cold water

Instructions:
1. Start by combining all of the dry ingredients, from the rice four to the xanthan gum. Mix well.

2. Next, cream together all the wet ingredients. Use a mixer, you really want that butter broken down.

3. In 1/2 cup intervals, start adding the dry ingredients to the bowl with the wet ingredients. This is a good time to use the mixer again. It's important to get the butter evenly distributed throughout the flour mixture so you don't get bubbles in your cookies when they bake :). Continue this process until all the ingredients are combined.

4. Divide the dough in half, now freeze it for about 45 minutes. Sounds crazy, but this makes it easy to work with! You want it fairly solid and very cold.

5. Get some foil or parchment paper out, lay out enough to bake half the cookies on. GENEROUSLY dust this work surface with rice flour. I mean, really cover the parchment paper or foil, on the counter, with rice flour. This will prevent sticking and won't make the cookies taste bad--believe me, I did it :).

6. Using only half of the dough (leave the rest in the freezer until you're ready to work with it), shape it into a disc. Now dust the top and bottom with rice flour before placing it on the foil/parchment. Roll out the dough with a flour-dusted rolling pin, not too thin. Now have fun with the cookie cutters! You can leave the cookies on the sheet of foil, don't worry about the flour underneath the cookies--it'll help them to not stick when you try to remove them. Leave about 1/4 of an inch between each cookie, they don't spread much.

7. Preheat your oven to 350 and bake the cookies on the middle rack for about 12-14 minutes.

8. After they cool for about 30 minutes, you can decorate them with royal icing. I used this recipe. I doubled it and added a little less water.

Happy Easter Weekend! Please forgive my absence over these last few months! I have a good excuse. I'll let the photo at the bottom of this post explain everything ;).

Sugar cookies remind me of childhood. So simple, usually, but so yummy and sweet. I wish I could bottle the scent. But making them gluten-free, and photo-worthy, wasn't such a simple task...

Some important things to keep in mind when making these cookies and preparing the dough: The key is working with cold dough! I think that's the case with most buttery cookies, but it is absolutely essential here. Also, don't be afraid to get crazy with the rice flour. When I say sprinkle generously with flour, I actually mean pour the stuff all over your work surface so that these little guys don't stick! Oh yes, and let the cookies cool before you frost them.


The great thing about this particular Royal Icing Recipe is that it's pretty forgiving and doesn't harden as quickly as I expected it to. Not that I know much about royal icing, this is the first time I've actually decorated sugar cookies with it! I made mine a little thicker than Martha's recipe, but that's because I used liquid food coloring; I've heard that you should actually use gels? Anyone have any good frosting other tips to pass along? I think keeping the frosting covered with a moist cloth or in an air-tight pastry bag also helped. I was even able to stick the leftovers in the fridge and finish decorating the rest of the cookies the next day...

But don't let that photo fool you! Most of the cookies didn't look like that :). I don't even want to talk about how much time I spent on those three cookies for that one photo; let's just say, I don't think Martha would've approved of the others. But who cares! The best part of this experience was getting to decorate them alongside my two pals, the hubby and Mirabel. Of course, when I handed Mirabel a small baby spoon loaded with lavender-colored frosting, and a cookie to decorate, she decided that the spoon of frosting belonged in her mouth instead of on the cookie. She ate the cookie second, then she proceeded to take one bite out of every other cookie I gave her to decorate. But when you're not quite two (or 28), that's how cookies are supposed to be enjoyed, right ;)?

Have fun baking and decorating these cookies with your loved ones this Easter weekend. And if you can't get around to making them until Christmas time, don't worry...who am I to judge? My initial plan was to make them around Christmas, but I was a little tired at that point in the pregnancy... And that's the obvious give-away, but below is the photo I promised, anyway :). Here are my TWO little girls. Juliette will be here this August (25th), just in time to start thinking about decorating Halloween cookies! Hopefully Mirabel will share the frosting with her!

...And if I owe you an email, you'll hear from me shortly :). Thanks!

Friday, November 11, 2011

Peppermint Fudge Brownies


Peppermint Fudge Brownies
makes 14-18

2/3 cup fine brown rice flour (Bob's Red Mill. I've found that other brands are too grainy.)

2/3 cup tapioca starch (also Bob's)

3/4 cup unsweetened cocoa powder

1 1/2 tsp coarse sea salt

1/2 tsp xanthan gum

4 large eggs, at room temp

1 1/2 sticks melted unsalted butter

2 cups sugar

3/4 cups heavy cream

1 tsp vanilla extract

1 cup semisweet chocolate chips, melted

For the topping:

14 peppermint Ghirardelli peppermint bark squares*

1-1 1/2 cups peppermint candies, chopped (I actually found these already chopped up in the baking aisle @ HEB.)

*I don't believe they have gluten. I haven't had problems with them.

Instructions:

In a large bowl, cream sugar with eggs and melted butter. Stir in cocoa; mix in vanilla extract and heavy cream.

Mix together flours, xanthan gum, and salt in a medium bowl.

Melt chocolate chips, then slowly stir them in with wet ingredients.

Slowly mix in the dry ingredients with the wet ingredients, mix well.

Pour brownie batter into a greased 3 quart baking dish.

Break up Ghirardelli chocolate mints. Arrange over the brownie batter.

Bake in a preheated 350 degree on the middle rack for 30 MINUTES.

Sprinkle over a cup of chopped peppermint candies. BAKE 10 MORE MINUTES on middle rack.

Allow to cool completely before slicing brownies (otherwise it'll be messy :).


Tuesday, October 11, 2011

Mini Gluten-free Pumpkin Salted Caramel Turnovers (aka Pumpkin Cajeta Empanadas)


I'm already thinking about which Christmas CD I'm going to start listening to first, come October 31st. (Technically, it's not a CD. It's a download or one of the many holiday mixes on itunes, but I can't bring myself to stop saying CD. :P) I figure, if Costco has their Christmas stuff up, then I'm already behind!

Holiday menu plans are already in the works. I'm actually considering making these empanadas instead of pumpkin pie for Thanksgiving. They travel a lot easier and there's no slicing required. (I still don't own a pie/cake cutter.)


What will be on your holiday menu this year?

My husband's been taking sweets to work every Friday, because Friday is his official "cheat day," it's also my baking day. (Well, some of the work usually begins on Thursday.) It was tough to share these ;), but they were a hit. A few folks already asked for the recipe. Here I am posting it almost a week later (sorry!). I'm happy to report that I left the few leftover turnovers/empanadas out overnight/uncovered and they weren't stale, stiff, or dry.

Flakey and good, with a pumpkiny center that was still moist.

I think this is my favorite dessert so far.


This recipe makes about 24, unless you make them huge. (The photo above depicts a huge one that I baked for the hubby and I so we could eat it with ice cream on top!) You'll have about half the filling left after. Tips for what to do with it? Mix it with a few scoops of vanilla ice cream for a pumpkin caramel milk shake. Or add a few tablespoons of heavy cream to it, heat it briefly, then mix everything to enjoy it as a pumpkin caramel pudding :).

The filling is thicker than pumpkin pie filling, almost custardy. I made it that way so that it wouldn't sneak out of the pastry during the baking process. It worked perfectly!

To make the dough, view this danish recipe but use 1/4 cup almond meal instead of 1/4 cup potato starch.

Also, I really like how this video explains how to roll out the dough. I rolled out the dough (and butter dough ball :) like this. I didn't understand a word, but it's a great video tutorial, still :P.

Then....use a small glass with about a 3 inch diameter to make the circles. Flatten them out a bit, add about 3/4 TBSP of filling on half the circle, then fold over and pinch the sides closed or seal with a fork. Using a pastry brush, brush the pastries with cinnamon butter. To make the cinnamon butter I used 1 1/2 tablespoons of butter mixed with 1/4 tsp cinnamon and sugar to taste for every 8 pastries, and I brushed them right before baking (it's better to do it a little at a time like this because it will harden as it cools). Bake on a cookie sheet lined with parchment, on the middle rack, in a preheated 350 degree oven for about 16 minutes.


Pumpkin Caramel Filling:
1 can pumpkin
1 13.4 ounce can of Nestle's dulce de leche (this one)
1 tsp pumpkin pie spice
3 tablespoons corn starch
1/4 cup heavy cream
1/4 tsp coarse sea salt

Combine pumpkin and dulce de leche in a sauce pan over low heat. While constantly stirring, cook on medium-low until the dulce de leche is completely melted into the pumpkin; stir in pumpkin pie spice. Set aside and allow to cool for a few minutes, very slowly sprinkle in the corn starch while stirring (too quickly and it'll get lumpy). Raise heat to medium and reduce while continually stirring for 5 minutes. Set aside, stir in heavy cream and coarse salt.


Wednesday, September 7, 2011

Gluten-free Pecan Pie


If I had to choose one dessert that reminds me most of the Lone Star State, it'd be pecan pie. Unlike a lot of pies that require cooling before eating, pecan pie is delicious right out of the oven with ice cream (especially if you've got vanilla ice cream nearby).


Gooey, warm, molassesy, nutty... Molassesy? That's how I'd describe this pie. I used two somewhat different ingredients for the filling. Instead of using light brown sugar, I used dark brown sugar (more molasses). Instead of using regular corn syrup, I used dark corn syrup.

Ack! Corn syrup? I'll be honest. I've tried pecan pies without it and I personally find that it adds something to the texture of the filling. I tried the filling in this pie recipe and liked it, but wanted to go a little darker. I like dark chocolate and I like dark pecan pies. If you like toffee and molasses, you'll enjoy the warmer flavors in this pecan pie. Even gluten eaters gave it two thumbs (or forks) up! :) Actually, my husband gave it two spoons up because he likes to eat pie with a spoon.


Say a little prayer for Texas as you devour your next slice of pecan pie. It's a little more than hot out here, especially with all these fires! Maybe if we all do a rain dance together this drought will come to an end!

For the pie crust:
1/2 cup brown rice flour
1/2 cup sweet sorghum flour
1/2 cup almond meal
1/2 tsp xanthan gum
1/4 cup sugar
1 1/2 tsp vanilla extract
2 tablespoons water
1 1/2 tablespoons shortening, cubed
4 tablespoons cold butter, cold and cubed

Combine all dry ingredients. Next add the vanilla, butter and shortening. Time to get your hands dirty! Fold everything in. Then add the water towards the end. Shape dough into a ball. You can chill it or work with it as is. I like to roll it between 2 pieces of parchment paper. Because gluten-free dough isn't as elastic, don't roll out the pie dough too thin. Instead, roll it out up to 1/2 inch thick. Then place it in a greased pie pan. From there I do the repairs. This dough is resilient so you can easily shape it or pull off a piece here and there if there are areas that need more dough. Think of yourself as an artist working with clay :).

Pecan Pie Filling:
1 cup dark brown sugar
3/4 cup dark corn syrup
1/4 cup butter
1 tablespoon water
3 teaspoons corn starch
3 eggs
1/4 tsp salt
1 tsp vanilla
1 1/2-3/4 cups pecans

This is the easy part! Slowly melt the butter in a pan. Mix the corn starch and water together in a small cup/bowl. Add the brown sugar to the melted butter--stir well. Next, add the corn starch, then stir in the corn syrup and everything but the eggs and pecans. Move it away from the flame. Allow it to cool for just a minute. Mix eggs together in a bowl and slowly pour the eggs in with the rest of the melted filling, then mix in the pecans.

Pour the filling into the pie. Bake in a preheated 350 degree oven, covered with the pie crust protector and aluminum foil (or just foil). Bake with coverings for 45 minutes. Then remove all the aluminum/pie crust cover and bake 10-15 more minutes, or until slightly browned on edges. Allow the pie cool for just a bit when it's done so that it sets.

Saturday, September 3, 2011

Maple Butter Balls


I think I just heard a pin drop, or maybe that was the tiny cry of an enraged sugar ant protesting my absence from the kitchen. He's on strike because the countertops have been free of cookie, cake, pie, and pastry crumbs for much too long.

That's changing, though. These toasty summer days here in Texas aren't keeping me away any longer. We've said goodbye to our old place in Boston, and now we're settled in our new home here in the Lone Star State--this oven's still too shiny, not enough charred pie filling stuck to the bottom just yet, but we'll change that soon enough.

I've actually started baking already (still, that was a month ago, too long!). Made a pecan pie a few times. Baked a batch of maple multigrain rolls, even. But, of course, I didn't photograph the evidence!

I better have a good excuse for this nonsense!

Though it's been quiet around here, life has been anything but boring. We've had a few adventures, including moving across the country after graduating from law school (my hubby, not me :), learning how to function while waking about 5 times a night (we've got us a night owl ;), also learning how to squeeze in a bazillion chores while also working from home during naptime. Life is full! I feel very blessed. I've missed you all dearly, though!

Can you believe I baked these cookies on March 29th! Talk about a stale recipe! I made them right after we went maple sugaring. Though I will miss Northeastern foodie adventures like that one, I will definitely miss them a little less when I'm not having to shovel snow December-March :D!

If I had to choose a favorite flavor, maple would be it! I've always found that baking with maple gives desserts a buttery kind of sweetness that reminds me of fall.

Maple Butter Balls
1/2 cup sweet sorghum flour
1/2 cup brown rice flour (I think Bob's has the best texture)
1/4 cup almond meal
1/4 cup white rice flour
3 1/2 tablespoons cold butter
1/2 tsp fine sea salt
1 large egg
2 tsp vanilla extract
1/2 cup white sugar
2 tablespoons grade b maple syrup
3 tablespoons maple sugar, for rolling and more for sprinkling after


Makes about 24 balls
I like to mix up all the flours in a large bowl with the salt. Then in another smaller bowl, I add the wet ingredients, including the maple syrup and the sugar. The Maple sugar is for sprinkling on top of the cookies.

Bake on a greased cookie sheet (you don't have to space them apart too much) in a preheated 350 degree oven for about 13 minutes, sugar will be a bit browned on top when they're done.

They'll be a little soft right when you take them out, so let them cool on the baking sheet for about 7 minutes.

Thursday, February 3, 2011

Gluten-free Croissants

Guess who?

Croissants!

little ones...

A letter from the croissants:
"We're finally here! Tasty right out of the oven, warm and buttery. 2 sticks of butter for just 14 of us, so you better believe we're buttery-delicious! You'll love the sweet aroma we give off while we're baking! We taste similar to those Pillsbury ones, except we're
homemade and gluten-free. (Shhh! Don't let our baker know that we told on her--she used to eat those a few years ago, before saying goodbye to gluten!)"

"We're cute and little, and still tasty next morning--no bed head, promise! We just need to warm up to the idea of being eaten the day after baking (that is, if we're still around), so stick us in the micro for 15 seconds and we'll be as good as new. Top us off with fresh strawberry or blueberry jam. We've heard that we're also pretty tasty with cranberry sauce (think Thanksgiving
or Christmas dinner, or even Valentine's Dinner!). Speaking of Valentine's, I bet we'd be delicious with a chocolatey filling!"

"Oh, and if there's a stranger living in your house who's on an anti-carb kick, you can make one extra little for them. See our wittle brother below? He's kinda camera shy--tried to disguise himself in rice flour while we were getting ready for the big photo shoot!"


Gluten-Free Croissants (makes 12-14 little ones)

Bowl 1:
1 cup white rice flour
1/2 cup brown rice flour
1 cup tapioca flour
1/2 cup sweet sorghum flour
1/4 cup potato starch
1 1/2 tsp xanthan gum
1 tsp sea salt
keep on the side:
2 sticks of cold butter
Bowl 2:
1 tbsp sugar
4 tsp yeast
1/4 cup warm water
Bowl 3:
2 large egg yolks (keep egg whites for egg wash)
1/2 cup evaporated milk
1/2 cup sugar
1/4 cup reserved white rice flour (just use it as you need it, don't use it all at once!)

Instructions:
Mix together ingredients from bowl one. Set aside.

In bowl 2, combine sugar and yeast, then add warm water; set aside and allow to proof (should become foamy on top), for about 10 minutes.

Keep on the side:
2 sticks of cold butter

Combine all ingredients in third bowl, set aside.

Now combine the ingredients from the third bowl into the large first bowl (with the flours!). Don't add yeast yet!

Cut up the cold butter into cubes (basically follow the lines on the butter wrapper, then cut them in half, after that so they're in half tablespoon amounts).

Wash your hands, then start adding the butter in, a little at a time. Work the dough with your hands until you've added all the butter. It's ok if there are lumps of butter still.

Now slowly pour in the yeast. Continue working the dough with your hands. Wash your hands. Now shape the dough into a ball, sprinkle the outside of the ball of dough with rice flour, but not all of the reserved rice flour (just so the surface is lightly coated).

Divide the dough in half. Work with half the dough at a time. Set the other half aside and cover with a clean cloth.

Roll the dough into a rectangle, then use a pizza cutter or knife to even out all the edges so it's a clean rectangle. Now you're going to cut out and shape croissants with a knife (like the tutorial) or a pizza cutter. Note: Don't pull the croissants, just roll them. Gluten-free dough isn't as elastic!

Follow this tutorial for how to cut croissants--but don't pull the dough like she does :): http://www.youtube.com/watch?v=221rAwr0CWk&feature=related

Let rise for 1 hour, covered with a clean cloth, and kept in a dark warm area. Use pastry brush to lightly brush on egg wash.

You'll end up with 14 croissants. Bake them in a preheated 350 degree oven for 14-16 minutes.


Monday, January 31, 2011

Product Review: Kinnikinnick Cookies and Donuts!


If there's one gluten-free food I'm really skeptical of, it's frozen gluten-free donuts. That just sounds like a disappointment.

But disappointed is far from how I felt after taking a bit out of Kinnikinnick's Chocolate Dipped Donuts and their special Cinnamon-Apple Donuts--they were deeelicious!!!

They contacted me a few weeks ago to see if I'd sample their Cinnamon-Apple Donuts. I said yes, because I was already a fan of their gluten-free graham crackers. Plus, if there's one thing I learned in college, it's this: If food is free, eat it (well, most of the time). I'm so glad I accepted their offer! They were even nice enough to send over their chocolate covered donuts, a box of their chocolate creme cookies, and gluten-free panko bread crumbs. The chocolate creme cookies were also a hit--I even shared some with my non-gf eating friends this weekend and they enjoyed them too. I've yet to try the bread crumbs, but I'll certainly be using them in the near future.

The only problem with the donuts and the cookies? They're addicting. I just got a root canal, the last thing I need is more sugary desserts. Seriously, though, each bite convinced me that the $2500 root canal and crown weren't that bad. ;)

I will be buying the donuts again! I can see why they suggest buying the Cinnamon-Apple ones for your sweetie this Valentine's. It's easy to find tasty gluten-free chocolate, but donuts? Good GF donuts are a rarity. Thanks Kinnikinnick for making tasty ones!

Sunday, January 23, 2011

Gluten-free Wonton Soup (or Ravioli :)

Are you all staying warm these days? That seems to be a struggle for us here on the East Coast, as we keep getting hit with one snowstorm after the other. Now I've got a sick little one and a craving for soup. But not just any soup...wonton soup!

Wontons: little magic bundles of porky deliciousness (except, these here are more Texas-sized). Who knew that getting pork filling to taste restaurant-good could be soo easy? But only thanks to a certain tasty recipe that provided the inspiration for this cooking adventure.

I've been craving wonton soup for months now, no--probably more like years (you GF folks know how it is to have an unsatisfied craving for ages!). I finally gave in and decided to experiment. Here are the results of my first experiment...

What I learned:
We're not going to have as much elasticity using gf flour to make wonton wrappers as we would using all purpose flour. Surprise! ;) But why should we let that stop us from experimenting?!

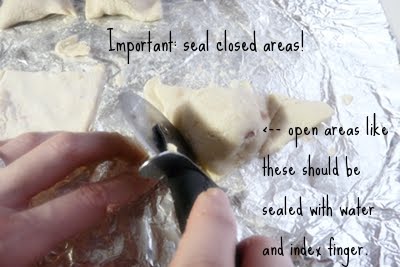
The good thing about this wonton dough recipe is that it's quite forgiving. I tried making the wonton wrappers (or squares) as thin as possible, and ended up with a few holes. Patching them up was fairly easy. Just use an extra bit of dough, if necessary. Keep a glass of water on the side to dip your index fingers in, so that you can use the water to "glue" the patch on. Smooth out the surface with more water. There were a few that didn't tear because I made 'em thick, but they ended up being thicker than I would've liked.

This dough is also pretty sturdy, because the wontons didn't fall apart after getting into some hot water (or chicken broth) with a few chopped green onions :). This particular recipe makes enough for 12 whole wontons, but the wonton filling (meatball) recipe makes enough for about 24.

When experimenting, I like to start off with small batches. You can just double the dough recipe if you like, or throw in a few meatballs without wrappers. They also won't dissolve in the soup :).

I think this recipe would make tasty homemade ravioli--give it a try and let me know how it works out for you!

I've also been experimenting with croissants! Yes, so far I've made them twice. Stay tuned for a croissant post in the very near future. (As in, not months from now. I promise to keep my resolution ;).

Finally...the recipe and a quick photo tutorial. Because of the elasticity issue, I decided to fold these more like ravioli than traditional wontons. :)

Wonton Wrappers, makes 12 complete:
2 tsp potato flour (not potato starch!)
1 tsp xanthan gum
1/4 cup brown rice flour
1/2 cup white rice flour
1/4 cup sweet sorghum flour
1 large egg
1/8 tsp sea salt
1/4 cup and reserved 2 tablespoons cold water

about 1/4 cup more white rice flour reserved, for rolling out wontons

Mixing instructions-create the flour blend first, then add the salt and xanthan gum. Mix well. Add the egg and water (2tbsp last). I divided the dough into smaller portions and covered the portions I wasn't using with a towel. You can either roll out with a rolling pin or use your hands (I found it easier to use my hands--like making tortillas). Then cut out individual squares (about 4 inches) with a pizza cutter; I filled each wonton with about 1.5-2 tsps of meat.

Wonton filling (ground pork):
1/2 pound ground lean pork
1 tsp mirin
1/2 tsp dried onion
1/2 tsp garlic
1 tablespoon soy sauce
1 tsp sugar
1/4 tsp ground ginger
Combine all ingredients, mix well.

Throw the wontons into a pot filled with 32 ounces of lightly boiling chicken broth. Add 1 tsp onion powder, and 1 tsp garlic powder. I also added 2 chopped green onions and a package of my favorite stir fry veggies (not traditional, but hearty :). I added the veggies at the very end, once the wontons were cooked (they should be firm, meatballs shouldn't be pink).


Tuesday, January 18, 2011

Cloudy with a Chance of...Molasses rolls?


Hi there , Folks!

I know, it's been ages! I'm a little nervous typing right now, because I feel like I actually have an audience! Believe me, this is definitely a good thing. I'm pleasantly surprised that you folks have subscribed. I'm not gonna list how many feedburner subscribers I have, because I'm sure some of you blogging pros will laugh at my excitement. Oddly, that's part of the reason why I don't blog as much these days, because I'm being watched :D!

I started this blog typing as if someone was reading, because isn't that how blogging works? At first, you tell yourself that the comments aren't there because imaginary blogging friends only have imaginary fingers, of course! Then, the adrenaline rush hits after the first couple of comments start rolling in; then you post a million times a day…and then?


Well, now you folks are saying things, and actually reading! Oh, the anxiety. I feel like you people are watching me now. I have a bit of stage fright, and I just use my 8 month old as my excuse for not posting ;). What if I forget to type in an ingredient when I input the recipe? What if the photos of my molasses rolls resemble meatballs instead of…molasses rolls. You all will kindly let me know, right? Right?!

In all honesty, I'm very thankful for you all! Thankful from the bottom of my carbohydrate-addicted heart! Thank you for giving me an excuse to bake gluten-free treats, especially now that my husband is on the paleo diet! Seriously, the guy is married to a woman with a blog called "Flour Arrangements" and he vowed to stop eating carbs in 2011! Meanwhile, my resolution is to post more on here! I guess opposites really do attract ;).

Enjoy these molasses rolls; I promise, despite the photos, they don't taste anything like meatballs! Actually, they don't taste much like molasses either, it's a very subtle molasses/spiced taste. Store them in an air-tight container, then warm 'em up in the micro for 15 seconds to enjoy them warm and soft after they've lost their "fresh outta the oven" texture.

Molasses Rolls (Makes 8)

Dry Mixture:
1/2 cup white rice flour
1/2 cup brown rice flour
1/4 cup almond meal
1/4 cup sweet sorghum flour
1/4 cup tapioca starch
1 tsp cinnamon
1/2 tsp nutmeg
1/2 tsp ginger
4 tablespoons low-fat dried milk powder
1 tsp xanthan gum
3/4 tsp sea salt
Yeast Mixture:
1 tablespoon sugar
2 1/4 tsp yeast
1/2 cup warm water (let rise until it just starts to foam on top--about 10 minutes)
Other wet mixture:
2 large eggs
2 tablespoons canola oil
1 1/2 tablespoons molasses

Combine all dry ingredients together, mix well.

In another small bowl, combine the water and sugar, then add yeast. Let it sit for about 8 minutes, or until foam just begins to form on top (proofing starts).

Next, combine the wet ingredients in another small bowl.

Fold the wet ingredients into the dry bowl. Then fold in the yeast mixture.

Let rise in a warm, dark area for about an hour.

Shape dough into individual rolls, about 8. Bake in a pre-greased cake or pie pan.

Preheat oven to 350 and bake rolls for about 22-25 minutes.

Store in air-tight container for up to 3 days (don't require refrigeration).